When life gives you Limes make a Chalkboard

Follow my blog with Bloglovin
 

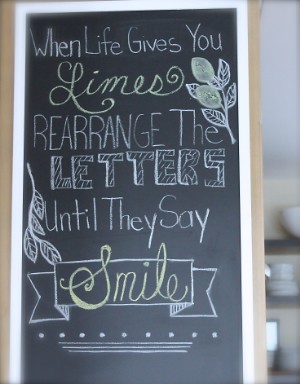
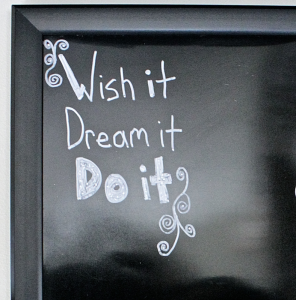
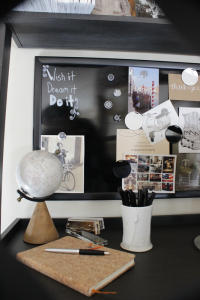
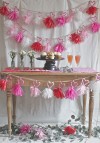
There are many Limes that life can bring and you can choose to handle them in your own personal way…I decided to make a chalkboard.

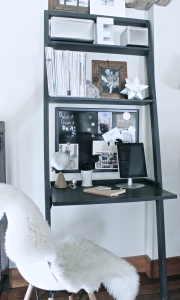
As our lives are busy and sometimes it is hard to keep track of all the things that need to get done a Chalkboard is a great visual place to jot down schedules, to do lists, appointments…etc.  The Chalkboard trend is something that has been around for a little while and continues to be getting more popular.  They are being used widely in Commercial Spaces such as Cafes,  Restaurants, and Retail, and have become a real trend in Event Decor.

Untitled

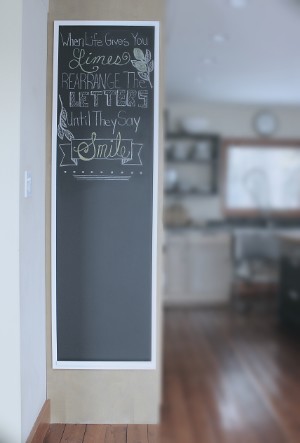
As a Stylist that sources items for many different applications; of course I scouted out for a Chalkboard, but they were to small, to big, and to ornate for what I needed. I just wanted a simple Chalkboard in White and Black with no big framing boarders…You think it would be easy to find!   Custom made things are costly and that is why there are so many DIY’ers ,but I do understand that paying for quality, convenience, and something one of a kind does come with a price. For these reasons alone I would have loved to find and buy the right Chalkboard.  I do encourage in supporting your local Artists and Businesses, as someone who is trying to make a living myself.  The challenge for me here was there was nothing out there in the mass market that would work for the space.  Not finding what I was looking for…

I asked myself, Why not Make it?

Untitled


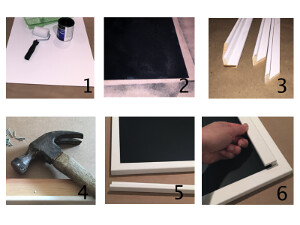
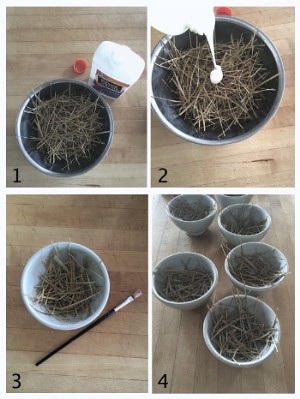
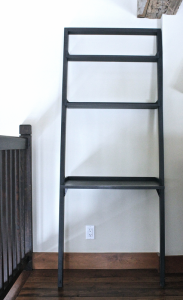
There is no tutorial outline on dimensions or how to make because this project was customized to a specific space. Shown in the above photo tutorial are the supplies used ( can be found at your local or favourite hardware store) and the assembly steps taken to make the customized Chalkboard.

  1. 1/4 ” thick MDF board sheet that was cut down to custom size, roller, tray and chalkboard paint.
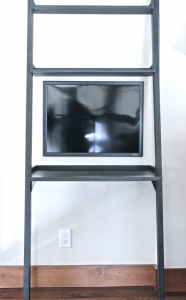
  2. Painted out the MDF board ( a couple of coats needed)
  3. Squared wood trim used for framing.
  4. Nailed back strapping for added support
  5. A bottom ledge to hold chalk in place
  6. Glued and nailed the ledge

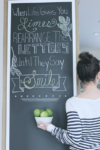
When life gives you LIMES…

Untitled


Make something you can SMILE about!

(or support your local Artist and or Business)

Untitled

Strawberry Drink Recipe for warmth

Follow my blog with Bloglovin

A Strawberry Drink Recipe to warm your interiors

     Just in time for Spring!  We sure have been having some cold and snowy weather patterns in my part of the world. With the spring season we are having (I keep hearing Marvin Gaye’s tune “What’s Going On” over and over in my head).  In general there are some spring days that are quite cool in temperature, but this is ridiculous!!, so I thought you might need a little interior warmth.

     You might be asking yourself, Why are recipes showing up on this website blog? Shouldn’t this website blog be about Interiors and Styling?  Here we go…I am an interior stylist and passionate about being creative in many ways.  As a former co-founder of a cafe (this is a good time to read my About Page on the website if you haven’t already) I would develop food and drink recipes and take photos of the product.  This not only allowed for my food and drink styling portfolio to be expanded, but it helped to keep my creative juices flowing.

     We often served warm steamers in our cafe as part of our kids drink menu, but this recipe is not just for kids.  A steamer is what we called a milk based drink, where the milk was steamed to a warm 120 degrees F (a perfect kid drinking temperature, but you can make the milk hotter if you like) and then we added a high quality sourced fruit syrup for flavouring.  This recipe allows you to make your own fruit syrup and use up any fresh or frozen berries that you may have in your household which is way more fun.  Keep scrolling to the bottom of this blog because there is a shopping opportunity for you (if you read the About Page on website you would also know about me and retail  😉 ) or just continue with recipe because…

It’s Easy and Delicious!

Strawberry Syrup Ingredients
  • 1 Cup Water
  • 1 Cup Organic Sugar
  • 2 cups Organic Strawberries (quartered)


Strawberry Drink Recipe


Now what do you do?

Bring to a boil the three ingredients listed above into a pot.   When you see that the strawberries are cooked (about 15-20 minutes) then remove the pot from heat source and let cool.  Once the Strawberry Syrup is cooled, run the strawberries through a sieve and use a whisk to crush and get as much flavouring out of the strawberries.

Strawberry Drink RecipeStrawberry Drink Recipe


Steam the milk (of your choice) with  a steam wand of an Espresso Machine to your preferred temperature. If you do not have access to a steam wand you can heat and whisk the milk in a pot on the stove.   Add your homemade Strawberry Syrup to your warm steamed milk and flavour to your liking.  But there is…


Strawberry Drink RecipeStrawberry Drink Recipe

Nothing like serving this Strawberry Drink Recipe in French Bistro Glassware.

This glassware allows you to see the the colour and the designs in your drinks,  and they are always a classic design staple to have in your glassware collection.  I have sourced out some french bistro glassware that you can purchase easily right here from Amazon.ca.  just click on the glasses and have fun making your c2-interiors.com recommended purchase!

Enjoy!

Create an Easter and Spring table setting

Follow my blog with Bloglovin

 “Spring is the time of plans and projects”-Leo Tolstoy

Spring is in the air and it’s the perfect time for plans and projects.  I recently posted this quote on some of my social media forums which are fun to follow because I try to post daily.  Blogging daily would be great too! Not there yet…more followers and more content needed.  Perfect time to interject “There’s no elevator to success. You have to take the stairs”-unknown (kids are you listening?)

Let’s quickly touch base on the plan part then we will end on the project I have created,  just in time for Spring and your Easter table setting.  Spring is the time to plan!  It may be a summer trip, a fresh coat of paint for your interiors, an outdoor event to host, or a garden to clean up (save your dried grass cuttings for the project below), or you may even want and need to buy new furniture for your indoor or outdoor use.  It’s also a good time to plan the cleaning and organizing of all your interior knick knacks (things that you may need to edit out of your life just in time to make room for something that I will show you how to create below, these ones you won’t want to throw away…I hope not!).  Spring may also be the time you need help to style your interiors, and these are all things I can help you with (except for the trip planning, I am not a travel agent, but could be…researchers say “up to seven careers in a lifetime”).  Make lists to help you organize, get things spring clean and styled or just move..

on to the Project part!

Create an Easter and Spring Table setting

Create an Easter and Spring table setting

Supplies:

  • Sea grass or dried grass cuttings
  • Bowls for shaping
  • Bowl for mixing ingredients
  • White Glue
  • Bowls to shape

Create an Easter and Spring table setting

How to:

  1. Cut dried grass into 2 – 4 inch pieces and place in a larger stainless bowl.
  2. Add white glue to soak grass bits and mix until the grass is well coated with glue.  Use your hands for this part which will be messy (not as messy as your garden before you trimmed the grasses back  just think a ” Spring clean” and recycle post 😉  Then just clean up with warm water and soap.
  3. Place a small amount of the glue covered grass into bottom of bowls and shape with your hands, (this part works best to use your hands again, use an old brush to help get pieces in place)
  4. Leave glue covered grasses to dry in bowls. Tip: I removed and placed on parchment paper before complete drying so they won’t stick completely to bowls.  If they do, just use a tool like spoon or knife to place from behind to loosen and remove.

Voila!

Untitled

Untitled


The great part about this project is not only are they beautiful for your Easter and Spring table setting, it is the fact that you can have fun with what you want to place in the middle of the nests (nothing too heavy). They also allow you to…

Think outside the nest!!!

(How amazing! would they be at an event table or to be used for a Bomboniere holder…the event stylist and italian relations side coming out!)

Happy Spring!!!

Create an Easter and Spring table setting

SaveSave

SaveSave

A corner styled workspace

Follow my blog with Bloglovin
Just the title of this blog post makes me “chuckle” because one of the inherited last names behind c2-interiors.com is Corner, and the work space was styled by no other than? Guess who? If you guess who, you win…nothing because there is no give aways here YET!, that is until this blog thing happens and I get a lot of followers, which then I can afford to give this desk or something away. This means it would be really beneficial for you to visit here often. A win win for all.

A corner styled workspace

A work space in a home is becoming a key area to pay close attention to. With more of us working form home and needing an area to do work, homework, and pay bills (which we all love). See enclosed pictures below for the work space styling process.

  1. Begin with a blank desk or empty work space fixture and work area.

A corner styled workspace

2.  Hang or place a board (cork, chalk, magnet) of your choice.  I chose a magnetic/writing board in this case because it is multi purpose.  These boards will let you organize , write to do lists, and inspirational quotes,  clip inspirational pictures, or place those bills to be paid (which we all love).  They seem to be able to do a lot of things except pay the bills. Ha ha…

3.  I found these unique magnets to help  you organize and  place inspirational pictures, work to be completed,
or keep sakes that you may like to glance at while you work.


A corner styled workspace

4.  Purchase containers or use your favourite pottery piece to help declutter and house your supplies like pens, pencils, markers, extra papers, and letters etc.

5. Placing collections of your favourite things and grouping them together to make a clean and simple statement always works best.


Make it your unique workspace!

Remember some studies show that physical clutter in your surroundings

competes for your attention, resulting in decreased performance and increased stress.

Trying to be serious about this matter, but have to admit “chuckling”at the above statement. As a stylist one edits clutter all the time to get the environments picture perfect, Does this mean there is a lot of stress and not a lot getting done out there in the world? Oh well, at least this corner styled workspace is organized!  (Until the kids get at it!)

A corner styled workspace

Make Hot Chocolate Parisian Style, Recipe!

Follow my blog with Bloglovin

Can we say AU Chocolat Chaud “Hot Chocolate”!

When made with the right ingredients and done the “Parisian” way.

A cup of hot chocolate is an exceptional experience to be had…if you ever visit Paris, France that is!

What’s so special? Well, it is served thick and made with real chocolate and milk (unlike the powdered

watered down version you may have experienced in my part of the world…North America).

Hot Chocolate in ParisHot chocolate recipe

After all, it is still the winter season here and if it’s not the winter season in your area…If you love Chocolate, then you will love this recipe anytime of the year!

It is a super easy recipe and delicious, but before we get there; I am going to take you on another trip.

Where does Chocolate come from?  We found out this answer on the island of Grenada,

when the family had a tour of a chocolate factory.

A small informative lesson is needed as I have posted pics of the process, and as much as

I would like to leave it at that, I am told that blogs need content and it’s all about the content…yes,yes,yes.

Trust me this will be short and sweet (short like me and sweet like chocolate).

Remember…it’s really more about the visuals here in my blog world.

Cocao comes from the tree called “Theobroma (Greek for “food of the gods”) Cocao”. No I am not taking you to Greece now, maybe in the future I sure would love to go again ( o.k. side tracking, stay focused on blog at hand).

Cocoa pods are harvested twice a year. The beans are white in colour and have a sticky pulp. They get placed in wooden bins and covered with banana leaves.

The cocao beans are then left to ferment, and this process can take a few days or up to a week, depending on the quality of the beans.

The heat created in the fermentation process takes the bitterness out of the beans and makes them more edible because they start to taste like chocolate. The cocao beans are then placed in the sun for about a week to sweeten and dry up.

They get stirred around by walking on them and swooshing them around with your feet (kids had fun with this…just hope those beans got a good rinse afterwards).

Now back to the…

“Make Hot Chocolate Parisian Style, Recipe”

Hot Chocolate Recipe

Make Hot Chocolate Parisian Style, Recipe


2 cups (16 0z) whole organic milk

5 ounces (130 g) bittersweet chocolate, (best quality fair trade organic)

Option to use 2 tablespoons of light brown sugar, or organic cane sugar (if you use real bitter sweet chocolate).  If you use chocolate with sugar in it you will not need to add more sugar.

  1. Heat the milk in a medium- sized saucepan.
  2. When milk is warmed up, you can add chocolate pieces into it. Make sure to keep whisking until all chocolate is melted and steaming hot.  You can achieve the thick consistency by whisking constantly for about 3 minutes at a very low boil.
  3. When ready, pour into a demitasse cup ( this recipe should yield 4 servings , but of course I used a large cup  I’m in North America).
  4. Add a little sprinkle of “fleur de sel” for a little touch of saltiness.


Hot Chocolate Parisian Style Recipe

You may have asked yourself… was this a Travel Blog? or a Recipe Blog?

I would say both, I took you somewhere with my pics and gave you a recipe, so now you can

Sit, Sip, & Enjoy slowly!…

Palm Tree

after you make your “Chocolat Au Chaud”!…or maybe it is” a learn a new language blog ?” ; )

How to make an”Open Heart” tassel?

Follow my blog with Bloglovin

It’s the month of February and Love is all around!…is it?

With the launch of a new website and the hope of creating content that will keep you coming back for a visit,

I decided to create an “Open Heart” Tassel.

They are simple to make (just like how most interiors should be styled). They were made with love and in a hurray to get something posted on the blog.

(honesty, is the best policy we try to teach this to our kids).

 The supplies are easy to find at your local craft store and can be made in many tissue colours to suit any event theme.

Don’t think just “Valentine’s Day”!

Yes!! I show how to make them… keep scrolling down


Continue reading “How to make an”Open Heart” tassel?”

error: Content is protected !!